About to close on a new home in Ankeny and want to make sure nothing important gets missed? You are not alone. Even brand-new homes can hide issues that affect comfort, safety, and your budget. In this guide, you will learn how a contractor-experienced agent can lead your pre-drywall and final walkthroughs, what to check at each stage, and how to keep timelines and warranties on track. Let’s dive in.
Why book a contractor-led walkthrough
A construction-literate agent knows how homes are built and where problems show up. That skill helps you spot issues before drywall goes up and again before closing. You get clearer priorities, fewer surprises, and better documentation.
A contractor-agent also speaks the same language as superintendents and trades. That keeps the process respectful and efficient while protecting your interests. You get realistic timelines, clear next steps, and a punch list that drives action.
How walkthroughs fit with city inspections
New builds in Ankeny move through required city inspections under building permits. Municipal inspectors check code compliance at stages like foundation, framing, insulation, and final. Your walkthroughs do not replace those inspections. They add buyer-focused quality control for workmanship, placement, and function.
Ask the builder to confirm which City of Ankeny inspections are required, when they were scheduled, and whether they passed. If you have concerns about code issues, request documentation of passed inspections or contact local building officials. Your walkthrough will focus on quality, operation, and finish.
Pre-drywall walkthrough: timing and goals
Schedule your pre-drywall walkthrough after rough framing and mechanicals, but before insulation and drywall. This is your best chance to fix hidden items without costly rework. Bring the plans and spec sheet so you can verify locations and upgrades.
During this walkthrough, your contractor-agent will focus on framing, electrical, plumbing, HVAC, and fire-stopping details. The goal is to confirm that what was planned has been installed correctly and is accessible for service.
Pre-drywall checklist
- Framing alignment and plumb walls in key rooms.
- Header sizes and placement at doors and windows.
- Blocking installed for cabinets, handrails, and grab bars.
- Window and door rough openings sized to plan.
- Electrical outlet and switch locations and mounting heights.
- Circuit routing and service panel location according to plan.
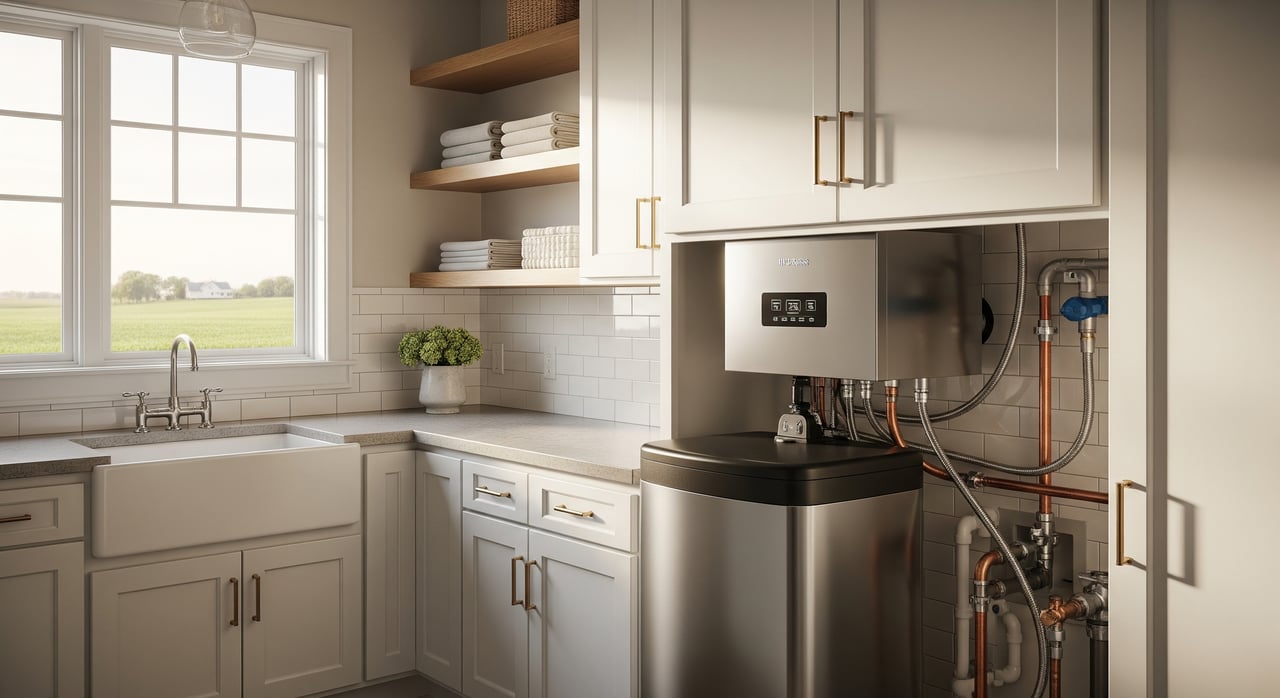
- Plumbing supply and drain locations; visible drain slopes.
- Water heater and laundry stub placements.
- HVAC trunk layout, return locations, and duct routing.
- Clearances at the furnace or air handler for service.
- Firestopping and sealed penetrations where required.
What you should receive pre-drywall
- A photographed, timestamped punch list with locations and notes.
- Priority flags for items that must be corrected before insulation.
- A clear request for builder sign-off on pre-drywall fixes.
Final walkthrough: timing and focus
Plan your final walkthrough a few days to a week before closing. This gives the builder time to address issues before you sign. If builder schedules require it, you can also do a final orientation on closing day, but earlier is better for repairs.
At this stage, you will test every system and review finish quality. Your contractor-agent will separate safety and functional items from cosmetics so you can set the right expectations.
Final walkthrough checklist
- Paint and drywall: touch-ups, nail pops, seams, and corners.
- Trim and doors: gaps, alignment, latches, and smooth swing.
- Cabinets and counters: alignment, hardware, finish, and chips.
- Flooring: transitions, squeaks, lippage, and damaged boards or tiles.
- Windows: open/close smoothly, locks, and screens.
- Plumbing: hot water delivery, fixture leaks, drain flow, and water pressure.
- Electrical: GFCI/AFCI operation, light fixtures, and outlet testing.
- HVAC: heating and cooling operation, airflow balance, and filter install.
- Appliances: operation, model and serial numbers, and manuals present.
- Safety: smoke/CO detectors, railings secure, steps and landings safe.
- Exterior: siding, soffits, gutters/downspouts, grading and drainage, driveway and walks.
What you should leave with
- A final punch list with photos and clear descriptions.
- Priorities labeled as safety/functional vs cosmetic.
- Requested completion dates and a builder response plan.
- Orientation notes on how to operate systems, plus warranty contacts.
Common new-build issues and fixes
Even good builders face punch-list items. Common pre-drywall issues include mislocated outlets, missing blocking, tight duct runs, and plumbing conflicts. Final-stage issues often involve paint, cabinet alignment, grout, door and window operation, and airflow balancing.
Your contractor-agent will help you push urgent items first. They can also request re-checks for system failures like non-working HVAC, miswired outlets, or sump pump issues.
Typical timelines you can request
Builders manage multiple trades and schedules, so timing varies. As common practice, expect faster action on safety and function.
- Immediate hazards or failures: target 24–72 hours.
- Functional fixes: target 7–30 days depending on scope.
- Cosmetic items: often scheduled 30–90 days out, or seasonally for exterior work.
Ask for the builder’s plan and named contact for warranty/service. Get timelines in writing when possible.
Warranty basics to confirm
Many builders offer tiered warranties as industry practice. Always get the full written warranty before closing.
- One-year limited: workmanship, materials, and finish items.
- Two to three years: sometimes for mechanical systems and major components.
- Ten-year structural: often for major load-bearing defects.
Also ask about transferability if you sell and how to submit claims. Keep dated photos and all punch-list records for warranty use.
Who attends and what to bring
Include the buyer(s), your contractor-experienced agent, and the builder’s on-site representative. If coordinated, key subcontractors may join the pre-drywall review. You can also bring a third-party inspector for added perspective.
Come prepared with plans and specs, a tape measure, and a phone or camera. Your contractor-agent will handle notes, annotated photos, and simple testers when appropriate.
How to schedule in Ankeny
Pre-drywall happens after rough-ins, before insulation. Ask your builder to provide a window for that milestone so you can lock in a walkthrough date. Aim to schedule the final walkthrough at least a few days before closing to allow time for corrections.
If closing is near and items remain open, request a written agreement listing what will be completed and when. Your agent can also discuss holdbacks or other contract remedies if needed.
What happens after the walkthrough
You will receive a structured punch list organized by location and priority. The builder provides a response plan with target dates and contacts. Your contractor-agent tracks progress and verifies completion.
If something is not done on time, your agent will follow up, document status, and, when appropriate, request re-inspection. All records go into one shared folder so warranty claims later are simple.
When to add third-party inspections
Independent inspections can add value when systems are complex or you want an objective report. Consider a third-party pre-drywall or new-construction inspection if you upgraded mechanicals or customized layout. Bring in specialists for geothermal, engineered structures, or unusual roofing. For suspected code issues, ask for municipal guidance or a licensed code consultant.
Why choose a contractor-agent in Central Iowa
You want someone who can read plans, spot risks early, and speak clearly with your builder. A contractor-experienced agent brings practical field knowledge to protect your timeline and your budget. You also get a calm advocate who organizes punch lists, sets realistic targets, and follows through.
If you are planning a new build in Ankeny or nearby Central Iowa communities, book your walkthrough support with a local expert who combines construction know-how with responsive buyer representation. Ready to get started? Schedule a free consultation with Jason Jennings Real Estate.
FAQs
What is a pre-drywall walkthrough for an Ankeny new build?
- It is a review after framing and rough mechanicals, before insulation, to confirm locations and quality for framing, electrical, plumbing, HVAC, and firestopping.
How is a buyer walkthrough different from Ankeny city inspections?
- City inspections check code compliance, while your walkthrough focuses on workmanship, placement, operation, and finish to protect your interests.
What should be on my final walkthrough checklist before closing?
- Test systems and appliances, check paint and trim, verify doors and windows, inspect flooring and cabinets, confirm safety devices, and review exterior drainage.
How fast should builders fix punch-list items on a new home?
- As common practice, safety and functional items are prioritized within days, most functional items within 7–30 days, and cosmetic items may take 30–90 days.
What warranties are common with new construction in Iowa?
- Many builders offer a one-year workmanship warranty, two to three years on some systems, and about ten years for structural, but confirm the builder’s written warranty.
Who should attend my Ankeny new-build walkthroughs?
- You, your contractor-experienced agent, the builder’s on-site representative, and optionally a third-party inspector or specialist if your home has complex systems.